he Red Robin (Photinia × fraseri ‘Red Robin’) tops every UK nursery’s bestseller list for hedging. Its fiery foliage colour, quick re‑growth, and year‑round greenery make it a top alternative to conifer or laurel plants. Yet one question dominates garden‑centre chat threads every spring: “How many Red Robin plants do I need per metre?”
Get the spacing wrong and you’ll either stare at daylight gaps for years or cram the roots so tightly that fungal infestation and poor air-flow stunt your hedge. In the guide below you’ll discover the exact planting density, the logic behind it, and pro tips straight from commercial hedge‑plant nurseries—so you create a Photinia hedge that fills fast, stays healthy, and wins compliments from both sides of the garden fence.
Quick Summary
Standard privacy hedge 2 m height: 2 – 2.5 photinia red robin hedge plants per metre
Ultra‑dense screen: 3 plants per m or a zig‑zag double row (approx. 5 plants per m total)
Specimen plant and mixed border: 1 plant per m for an airy look
Keep lines laser‑straight or use a staggered ‘trough’ layout for windbreak bed

Why Spacing Matters – Beyond Aesthetics
A correctly spaced hedge = better width control, thicker texture, and fewer trips for fungicide.
.

Photinia Red Robin Hedge Spacing Cheat‑Sheet
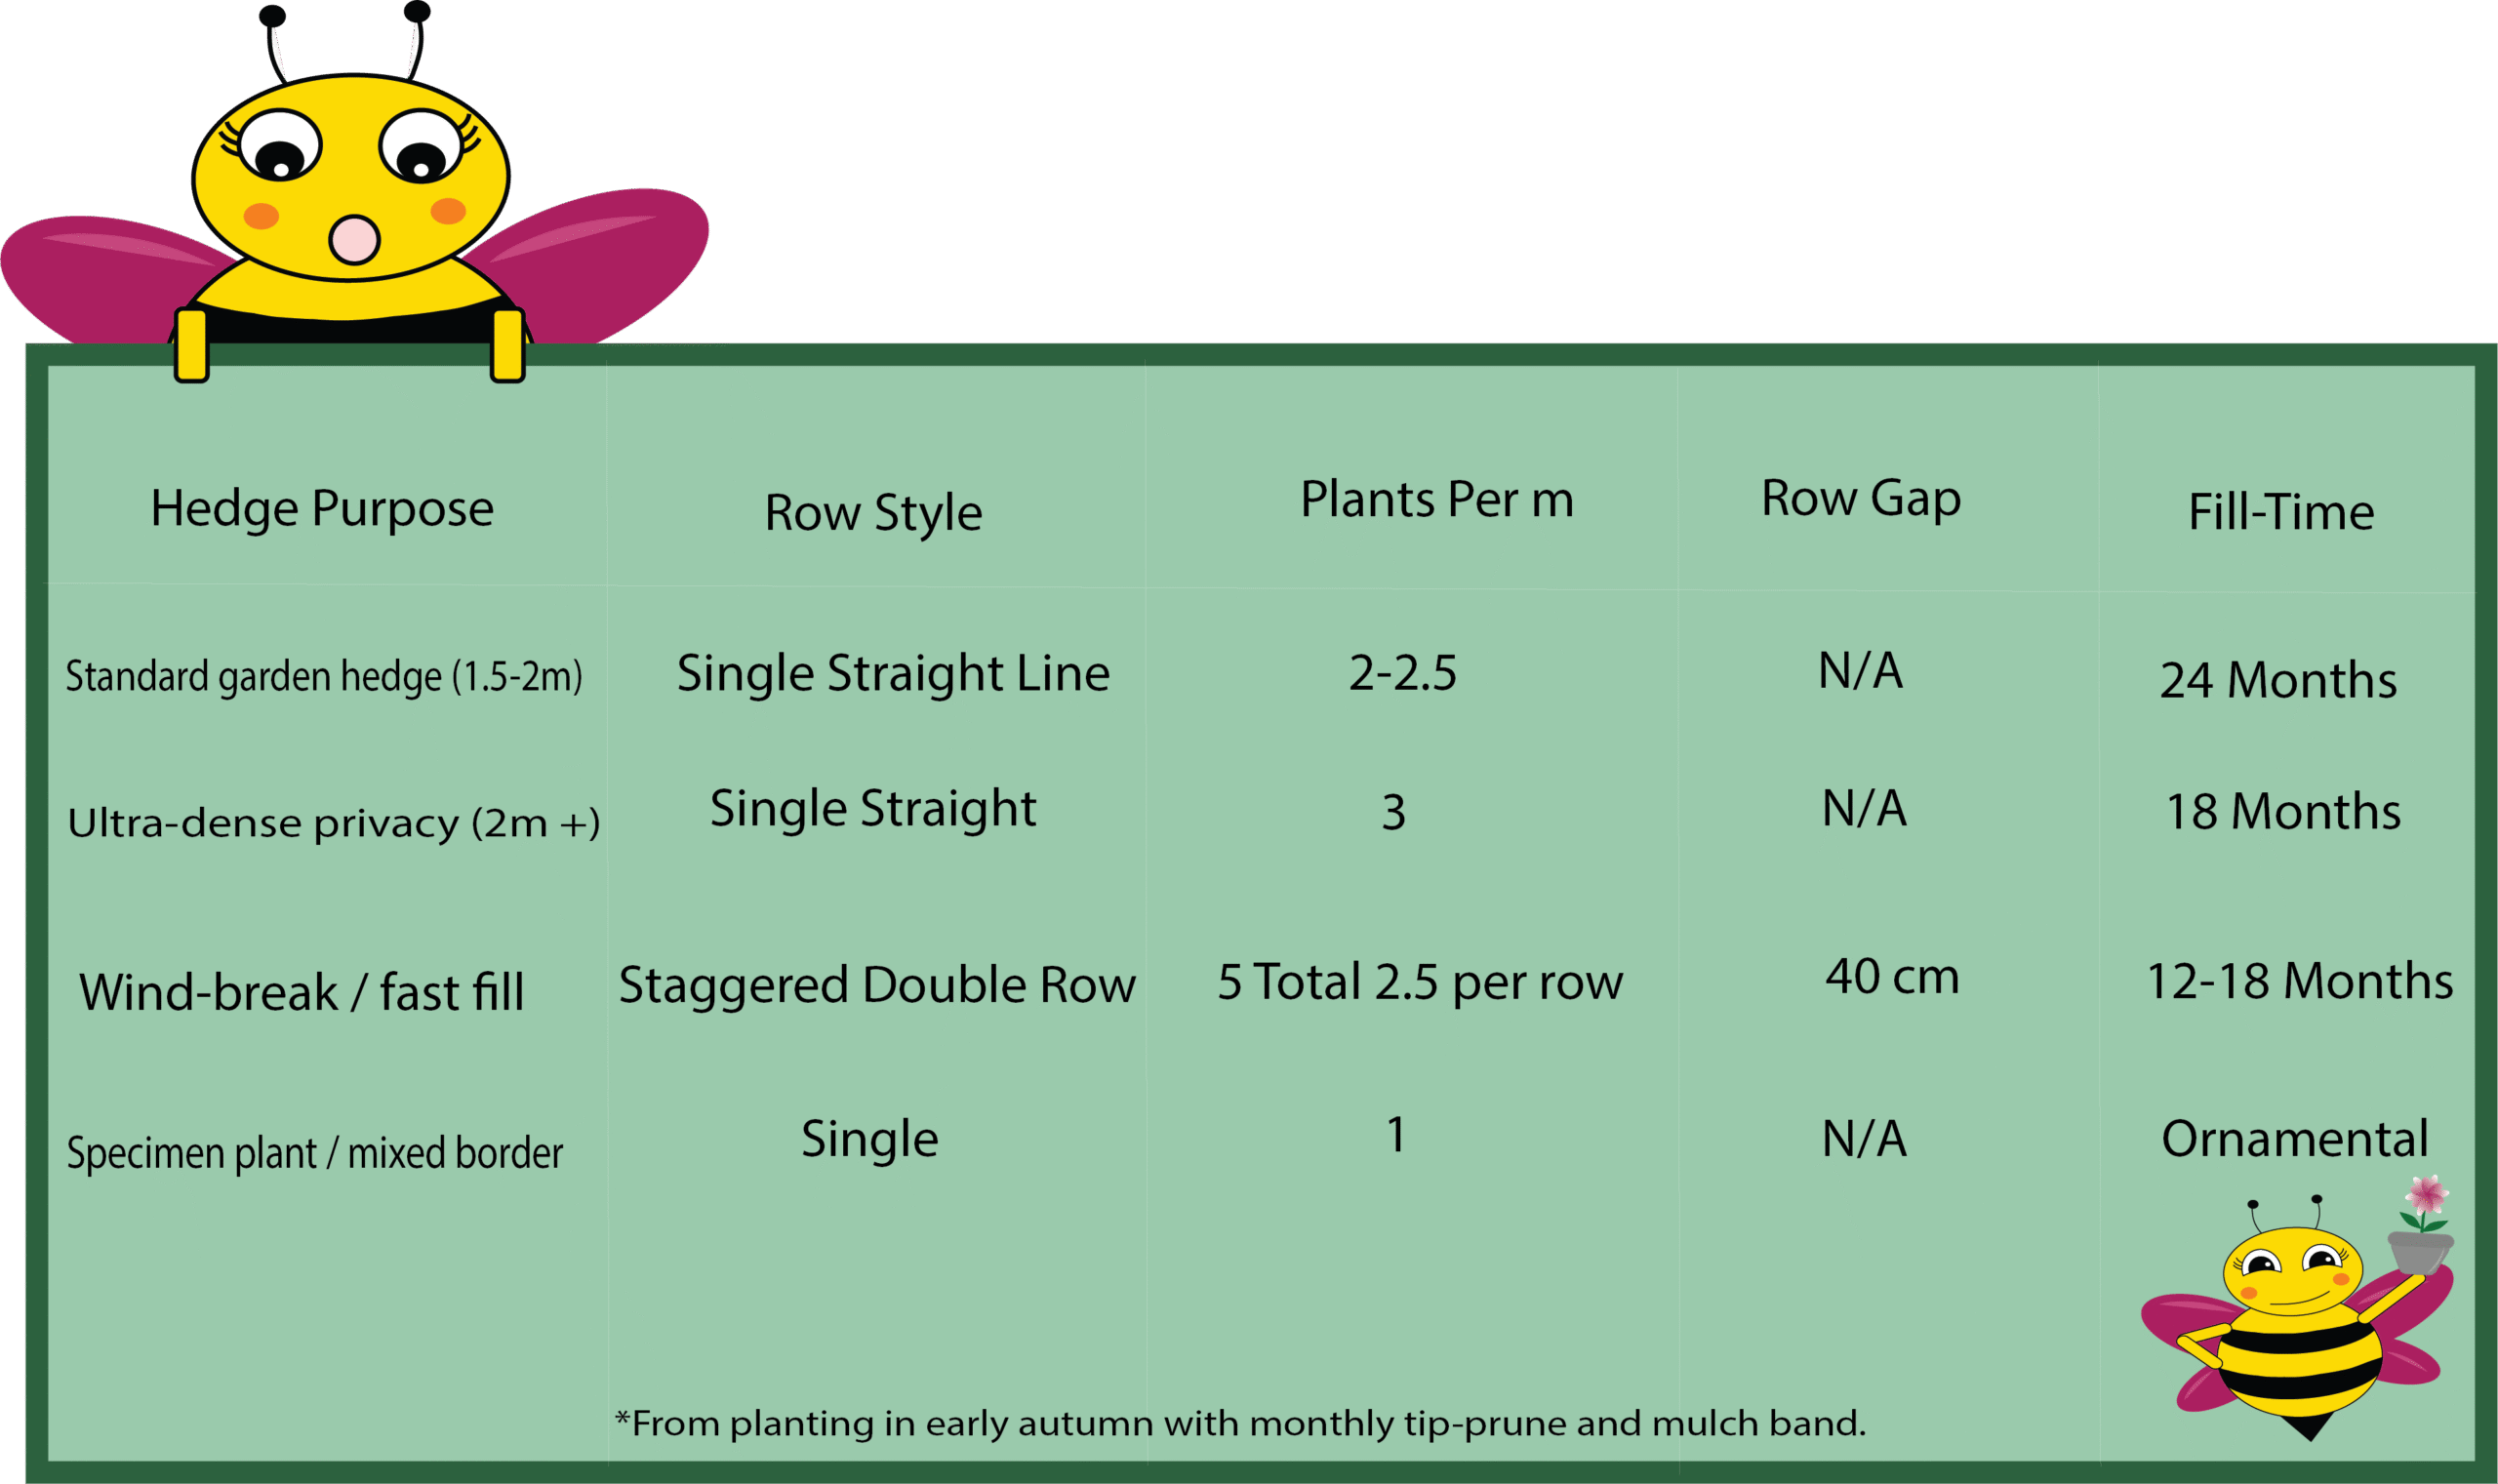
Planting Layout Options
Choose the pattern that matches your garden centre purchases and hedge planting options.


Did You Know ?
Once established, Red Robin shoots can extend 30 cm in a single month, beating many conifer species for speed.
Step‑by‑Step Planting Guide (UK Mainland Climate)
Insects such as aphids, vine weevils, and spider mites drain sap, eat roots, and open pathways for photinia diseases.
Spacing Marker – Lay canes or a tape marked every 40 cm for accuracy.
Planting Depth – Match pot depth; avoid burying the stem.
Back‑Fill & Firm – Eliminate air pockets; Red Robin hates a loose rootball.
Water Deeply – Soak immediately; continue weekly unless rainfall exceeds 25 mm.
Mulch Band – Add 5 cm bark mulch, keeping mulch clear of stems to prevent pest build‑up.
Did you know?
A double row reduces wind‑tunnel effect and protects delicate companion plants like spring bulbs tucked behind the hedge.
After‑Care & First‑Year Tips
- Tip‑Prune: Pinch 1–2 cm after first flush to thicken foliage.
- Fertiliser: Apply evergreen slow‑release granules every March for lush foliage colour.
- Pest Watch: Aphids & vine‑weevils can infest dense centres—spray neem or deploy nematodes early.
- Irrigation: Deep soak weekly through the first dry summer.

Choosing Quality Hedging Plants (What to Ask Your Nursery)
Healthy stock equals fewer fungicide bills later.
- Container vs bare‑root hedging: Red Robin is almost always sold container‑grown; skip bare root unless buying conifer or laurel species.
- Nursery grade / centre width: Look for 2‑litre or 3‑litre pots, 40–60 cm height.
- Check foliage texture: Avoid yellow, spotty, or overly soft growth—signs of greenhouse crowding.
- Pre‑order in bulk: Secures consistent height and lets the nursery reserve quantities for an autumn planting window.
Did you know?
A well‑spaced Red Robin hedge can create 50 m² of wildlife habitat, offering nectar in spring and berries in autumn—more biodiversity than a solid fence.
Companion & Gap‑Fill Plant Ideas
Mix Red Robin hedge plants with spring bulbs or low conifer shapes for a layered hedge planting distance effect. Good companions include:
- Viburnum tinus – winter flowers, similar planting density.
- Euonymus ‘Emerald ‘n’ Gold’ – evergreen ground texture at the base.
- Spring bulbs – daffodils pop through photinia roots without competing for light.

Plant Once, Enjoy for Decades
Mastering red robin hedge spacing–whether 2 or 3 plants per m–sets the stage for a hedge that fills fast, stays disease‑free, and demands minimal machinery or fungicide rescue. Measure twice, plant once, mulch, prune, and watch that scarlet flush ignite your boundary every spring.